REVIEW · STOCKHOLM
Magical ”Stockholm by Night” Photo Walk
Book on GetYourGuide →Operated by JP Photo · Bookable on GetYourGuide
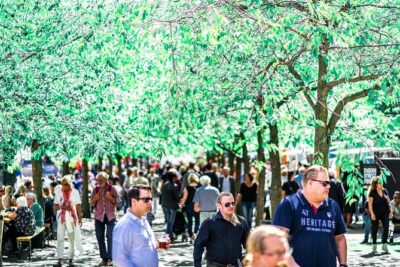
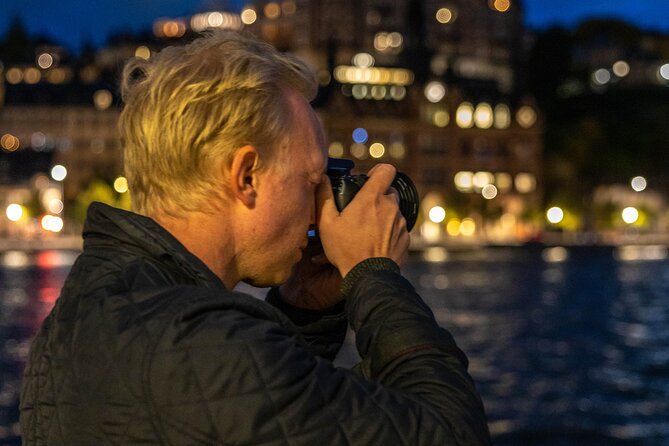
Night lights turn the city into a studio. This private Stockholm by Night Photo Walk focuses on taking control of low light with a calm, personal guide and practical lessons you can use right away. You start at Slussen right by Stadsmuseet and end in Old Town, riding that sweet spot called Blue Hour as the city begins to glow.
What I really like is the emphasis on making photos you’re proud of, not just collecting a few souvenirs. You get individual guidance and a route shaped to your level and interests, plus tools like headlamps for safer, easier night shooting. A reasonable consideration: it’s only 2 hours, so if you want to set up a tripod for very technical, slow-paced shooting, you may feel a bit rushed (a tripod is recommended).
If you’re curious, bring a camera or phone, and plan to walk in the dark a bit, this is a great way to learn night photography without getting lost in theory.
In This Review
- Key things to know before you go
- Slussen to Old Town: your night-photo classroom in real streets
- Blue Hour tricks: turning Stockholm’s low light into advantage
- Long exposure and light painting: what you’ll actually practice
- Sharp at night: keeping your frames crisp (not shaky)
- Composition with depth: how to make city lights look cinematic
- Tailored private guidance: why 2 hours can be worth it
- What’s included (and what you should bring)
- Pricing and value: is $155 reasonable for night photography?
- Who should book this photo walk
- Should you book the Stockholm by Night Photo Walk?
- FAQ
- Where is the meeting point for the photo walk?
- How long is the Stockholm by Night Photo Walk?
- What languages is the tour offered in?
- Do I need a tripod?
- Is the tour private?
- What do I get after the tour?
Key things to know before you go

- Blue Hour timing: you begin as daylight fades and lights start to reflect on the water
- Private, tailored route: your guide adapts to your experience level and what you want to photograph
- Learn long exposure + light painting: the goal is creative results, not just “point and shoot”
- Make photos with depth and mood: you’ll practice storytelling with framing, movement, and composition
- You’re not expected to be technical: curiosity beats math
- You get follow-up help: an eBook and a link to a guide called Skyline Stories
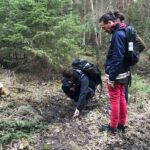
Slussen to Old Town: your night-photo classroom in real streets
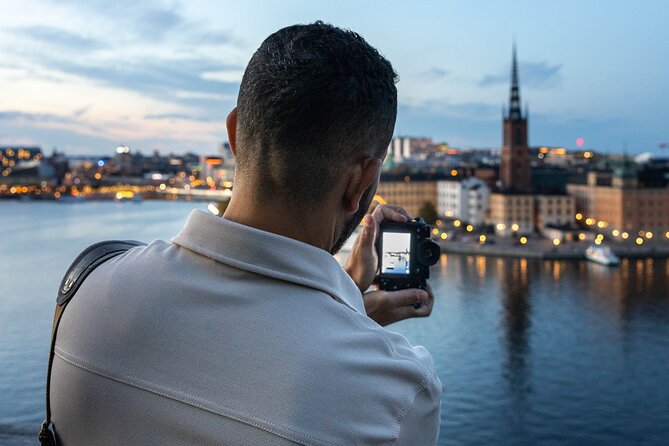
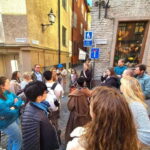
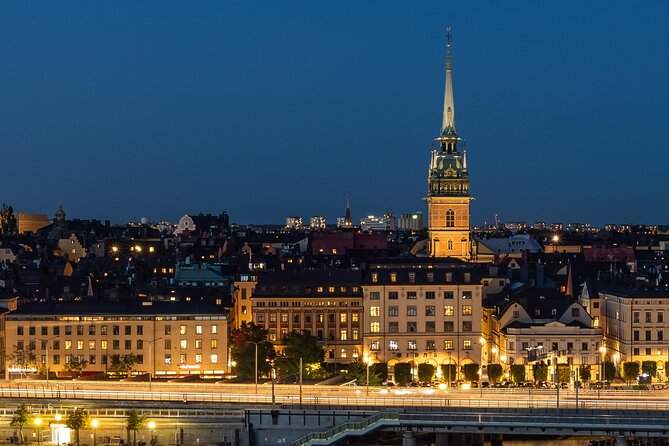
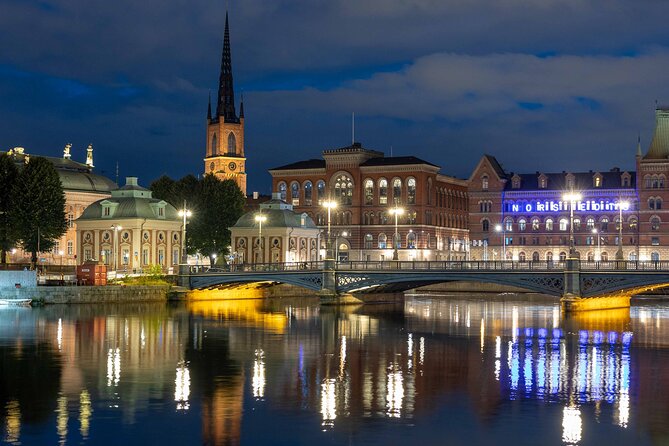
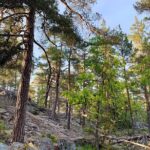
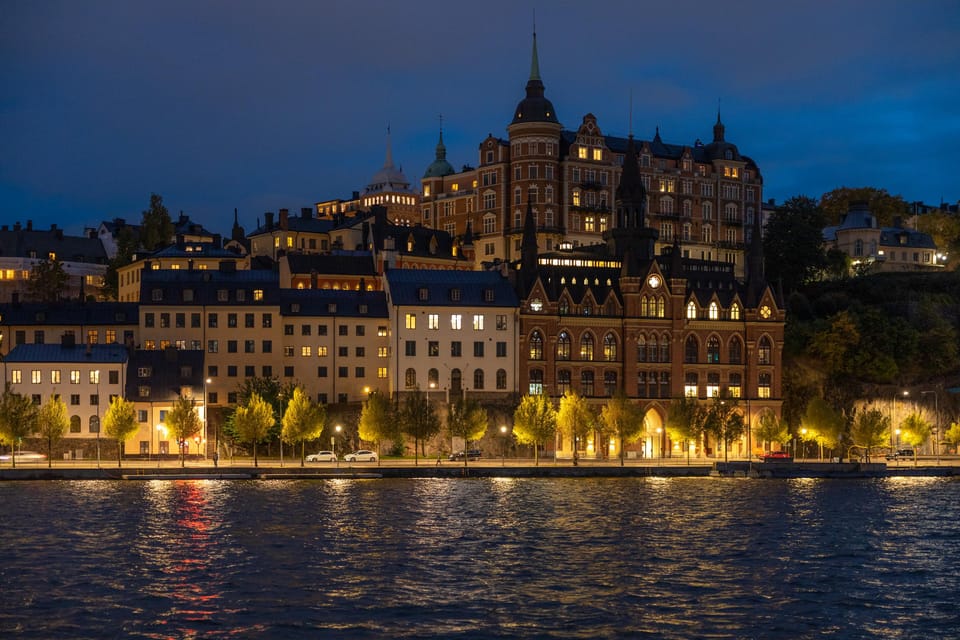
The walk starts at Slussen, right in front of the Stockholm City Museum (Stadsmuseet) at the subway station. That matters because Slussen puts you in a part of the city where the environment naturally does a lot of the work: water reflections, glowing windows, and strong lines for composition.
Once you’re moving, the session is built around a clear idea: Blue Hour is your cheat code. It’s that moment when the sky still has tone, but the city lights are on, so you get more layers than you’d get at full night. In practice, you’re walking and stopping in a way that helps you see how the same scene can look different as the light changes minute by minute.
The pace is designed to feel relaxed, which is a good thing when you’re shooting in low light. Night photography is partly technique, partly staying present enough to notice what’s working: a reflection, a framing angle, or the way headlights and street lamps add texture.
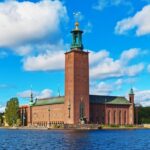
You’ll end in Old Town, which is exactly the kind of finish that makes the images feel like a real evening story. Even if you focus mostly on technical practice, that landing zone gives you classic architecture and atmosphere to wrap your learning into something visually satisfying.
You can also read our reviews of more walking tours in Stockholm


Blue Hour tricks: turning Stockholm’s low light into advantage
Your guide’s main job is to help you use the challenges of night photography as creative material. Low light can make photos blurry or flat, but it can also add mood. The guide’s approach is to show you how to keep images sharp, how to use longer exposures for artistic effects, and how to shape depth so your pictures don’t look like a blur of dots and lines.
Here’s the core concept you’ll keep hearing through the evening: night doesn’t mean less art. It means different art. You’ll learn how to capture scenes with drama and mood by working with reflections, light glow, and movement instead of fighting them.
And because your route is tailored, you’re not stuck doing the same exercise as everyone else. If you’re a beginner, you’ll likely get more step-by-step direction. If you already know some basics, you can focus on refining composition and exposure choices.
One extra practical detail: the walk includes headlamps. That’s not flashy, but it’s genuinely useful. It helps you see your footing and manage your camera handling at night, so you can stay focused on shooting instead of guessing what’s under you.
Long exposure and light painting: what you’ll actually practice
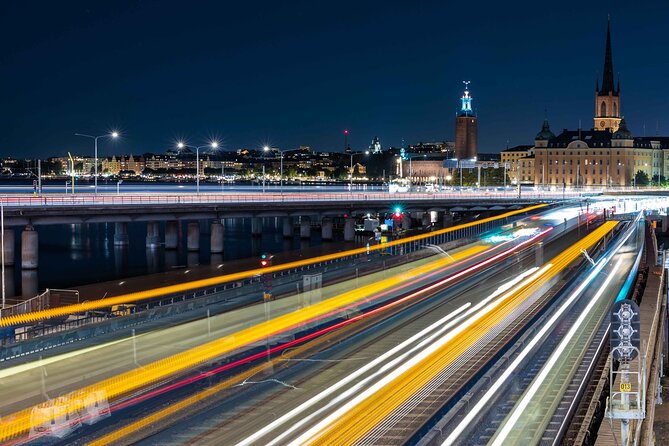
One of the biggest promises of this experience is learning how to paint with light and create long exposure images that look intentional. Long exposures let you capture more than what your eyes see in real time. You can smooth out movement, emphasize light trails, and make water reflections feel like they belong to the same dream.
A good night walk should teach you how to set up your thinking for long exposures, not just hand you a camera and hope. In this case, your guide helps you understand what to aim for: sharp subjects when you want them, controlled blur when you want that effect, and compositions where the light does the storytelling.
Even if you don’t consider yourself technical, you’ll likely cover the big workflow points that make long exposure easier:
- how to handle steadiness so you don’t lose sharpness
- when longer exposure time helps (and when it just creates mush)
- how to use movement creatively rather than accidentally
The tour’s long-exposure and “light painting” focus is also a confidence builder. Night photography often feels intimidating because errors are harder to spot immediately. With guidance, you learn what to look for while you’re shooting, so the evening stops being guesswork.
Tripod note: a tripod is recommended, but it’s not included. If you use one, you’ll have an easier time with long exposures and consistency between shots. If you don’t, you can still get results, but you’ll rely more on your ability to stabilize your camera and choose scenes that tolerate slight movement.
Sharp at night: keeping your frames crisp (not shaky)
Night scenes can look gorgeous, and still turn out soft if your setup isn’t stable. This walk addresses that directly: you’ll learn how to capture sharp images at night. That’s a big deal because sharpness is the difference between a photo that feels like a memory and one that looks like a light test.
The key strategy is to treat low light as a balance problem. You’re working with motion (your movement, people passing, water movement) and the camera’s need for stable capture time. Your guide will help you avoid the most common traps—like using settings that create blur when sharpness is the goal, or framing so tightly that small missteps throw the composition off.
Also, sharpness isn’t only about technique. It’s about choosing the right moment within the Blue Hour window. The city light intensity and contrast rise quickly, and your guide will steer you toward scenes where the exposure makes sense.
If you’re using a phone, you can still learn a lot from this walk’s process: look for stable framing, reduce unnecessary movement, and follow the guide’s composition direction. You might find phone limitations can make some long exposure effects trickier, but the composition and storytelling lessons still apply.
Composition with depth: how to make city lights look cinematic
A big part of why people love night photography is the mood. A big part of why they struggle is that night city shots can come out flat. This walk works on that by teaching you to create photos with depth, drama, and mood.
Depth comes from layering. You don’t need fancy gear. You need choices in framing:
- foreground elements that catch light
- midground subjects that anchor the scene
- background glow that gives scale
Stockholm helps because reflections can act like foreground depth, and the city’s glow gives you separation between planes. When you learn how to place those layers, your photos start to feel like you’re looking into the scene instead of just at it.
Drama is often a contrast and movement issue. If your guide encourages you to play with movement, that’s not random. Movement can turn a still city into a living scene, especially when the light sources create trails or streaks. The trick is using movement intentionally so it supports the story instead of drowning it.
And because the route is tailored, you’re not forced into one style. If you want cleaner, calmer frames, you can aim for that. If you want more expressive long exposure results, you can lean into it.
You can also read our reviews of more evening experiences in Stockholm

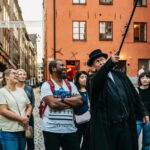
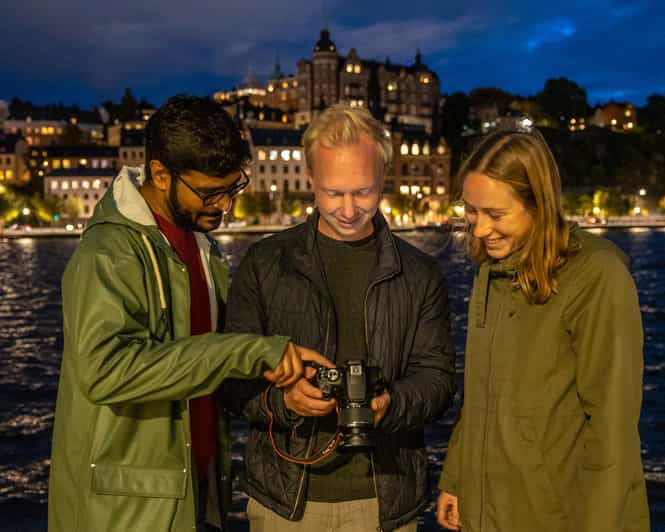
Tailored private guidance: why 2 hours can be worth it
This is a private group experience, and that changes how fast you learn. In a group, you might only get quick pointers. Here, your guide can slow down when you need clarity and speed up when you’re ready to experiment.
Your guide can adapt to your level and interests, and that’s a big reason the experience earns high marks. One past guest specifically praised how the guide adjusted perfectly to their photography level and led them to places in the city that they hadn’t known about. That’s exactly what you want from a private night photo session: someone who helps you see smarter angles and faster results.
Languages are English and German, so you can choose what you’re most comfortable with. The guide’s “local photographer” approach matters here too. It’s not just technical instruction. It’s knowing how Stockholm’s night behaves—where the light pools, where reflections look best, and which street corners tend to frame the scene well.
What’s included (and what you should bring)
Included items are built for night comfort and follow-through:
- Individual guidance by a professional Photographer and Guide
- Private experience with a tailor-made route
- Local insight into Stockholm and Swedish culture
- Headlamps
- An eBook about city photography delivered after the tour
- After the tour, you also get a link to a guide called Skyline Stories
Here’s what you should bring:
- Comfortable shoes (you’ll be walking, and it’s dark)
- Your camera (or your phone)
- A charged smartphone
Tripod: not included, but recommended. If you own one, bring it. If you don’t, you can still learn a lot, but you may want to plan your expectations around handheld stability.
Pricing and value: is $155 reasonable for night photography?
At $155 per person for a 2-hour private photo walk, you’re paying for more than “a guide who walks with you.” You’re paying for skill transfer and time.
This is what that price buys:
- Personal instruction instead of generalized tips
- A route adapted to your experience and interests
- Practical night-photo tools like headlamps
- Teaching aimed at long exposure, light painting, and low-light sharpness
- Follow-up learning via an eBook and Skyline Stories guide
If you’ve tried to learn night photography alone, you already know the frustrating part: you take shots, you don’t know what went wrong, and you try again next time. Here, the value is in reducing that trial-and-error window. Two hours isn’t long, but with direct coaching, it can be enough to change your photos immediately.
If you’re the type who already knows long exposure settings perfectly and you just want a calm self-guided walk, you might feel it’s pricier than you need. But if you want a structured learning session with direction, the cost starts to make sense.
Who should book this photo walk

Book it if:
- you want to learn night photography basics with real guidance
- you want to try long exposure and light painting without getting overwhelmed
- you want a route that adapts to your level
- you like exploring cities on foot and turning a walk into a photo project
Skip it (or at least consider alternatives) if:
- you only want casual daytime sightseeing and don’t care about learning photo technique
- you expect a full, gear-heavy workshop with extensive tripod practice
- you already have a solid night workflow and feel you won’t gain anything from coaching
Should you book the Stockholm by Night Photo Walk?
I’d say book it if you want your Stockholm photos to look like you knew what you were doing. The combination of Blue Hour timing, tailored private guidance, and a focus on long exposure and mood makes this a strong learning experience rather than a generic “walk and shoot” session.
If you can bring comfortable shoes, a camera (or phone), and a mindset that says, I want to learn in the moment, you’ll leave with more than images. You’ll have a repeatable way to think about night light—plus the Skyline Stories guide to keep you practicing after the walk.
FAQ
Where is the meeting point for the photo walk?
You meet right in front of Stockholm’s city museum (Stadsmuseet) at the Slussen subway station.
How long is the Stockholm by Night Photo Walk?
It lasts 2 hours.
What languages is the tour offered in?
The live guide speaks English and German.
Do I need a tripod?
A tripod is recommended, but it is not included. You can still participate with your own camera or phone without one, but longer exposures are easier with a tripod.
Is the tour private?
Yes. It’s a private experience with a private group format.
What do I get after the tour?
After the tour, you’ll receive a link to the guide Skyline Stories and also get an eBook about city photography.
If you tell me what camera you’ll use (or if it’s a phone) and your rough experience level, I can suggest what to practice first during the Blue Hour window.